How to Create Email Filters in Gmail
Updated March 2026 · 5 minute read
Gmail filters let you automatically sort, label, forward, archive, or delete emails based on rules you set. Once a filter is active, Gmail applies it to every matching email going forward. You set it up once and never think about it again.
This guide shows you every step with real screenshots. We'll cover creating a filter from an email, adding a forwarding address, verifying it, and activating the filter. The whole thing takes about 3 minutes.
Just want to try PostalDetox right now?
You don't need a filter to get started. Forward one Informed Delivery email manually, and you'll get your first PostalDetox report tomorrow morning. Here's the fast path in Gmail:
- Open your latest Informed Delivery email from USPS.
- Click the Forward arrow at the top-right of the email (or the three-dot menu → Forward).
- In the To field, type
mailroom@postaldetox.com - Click Send. That's it.
Tomorrow morning you'll get your first PostalDetox daily report back. Once you see it, come back and set up the filter below so you never have to do it manually again.
Sign up for PostalDetox freeReady for the one-time filter setup that forwards every future USPS email automatically? Keep reading.
In this guide:
1. Open the email you want to filter
Go to your Gmail inbox and find an email from the sender you want to create a filter for. In this example, we're filtering emails from USPS Informed Delivery so they automatically forward to another address.
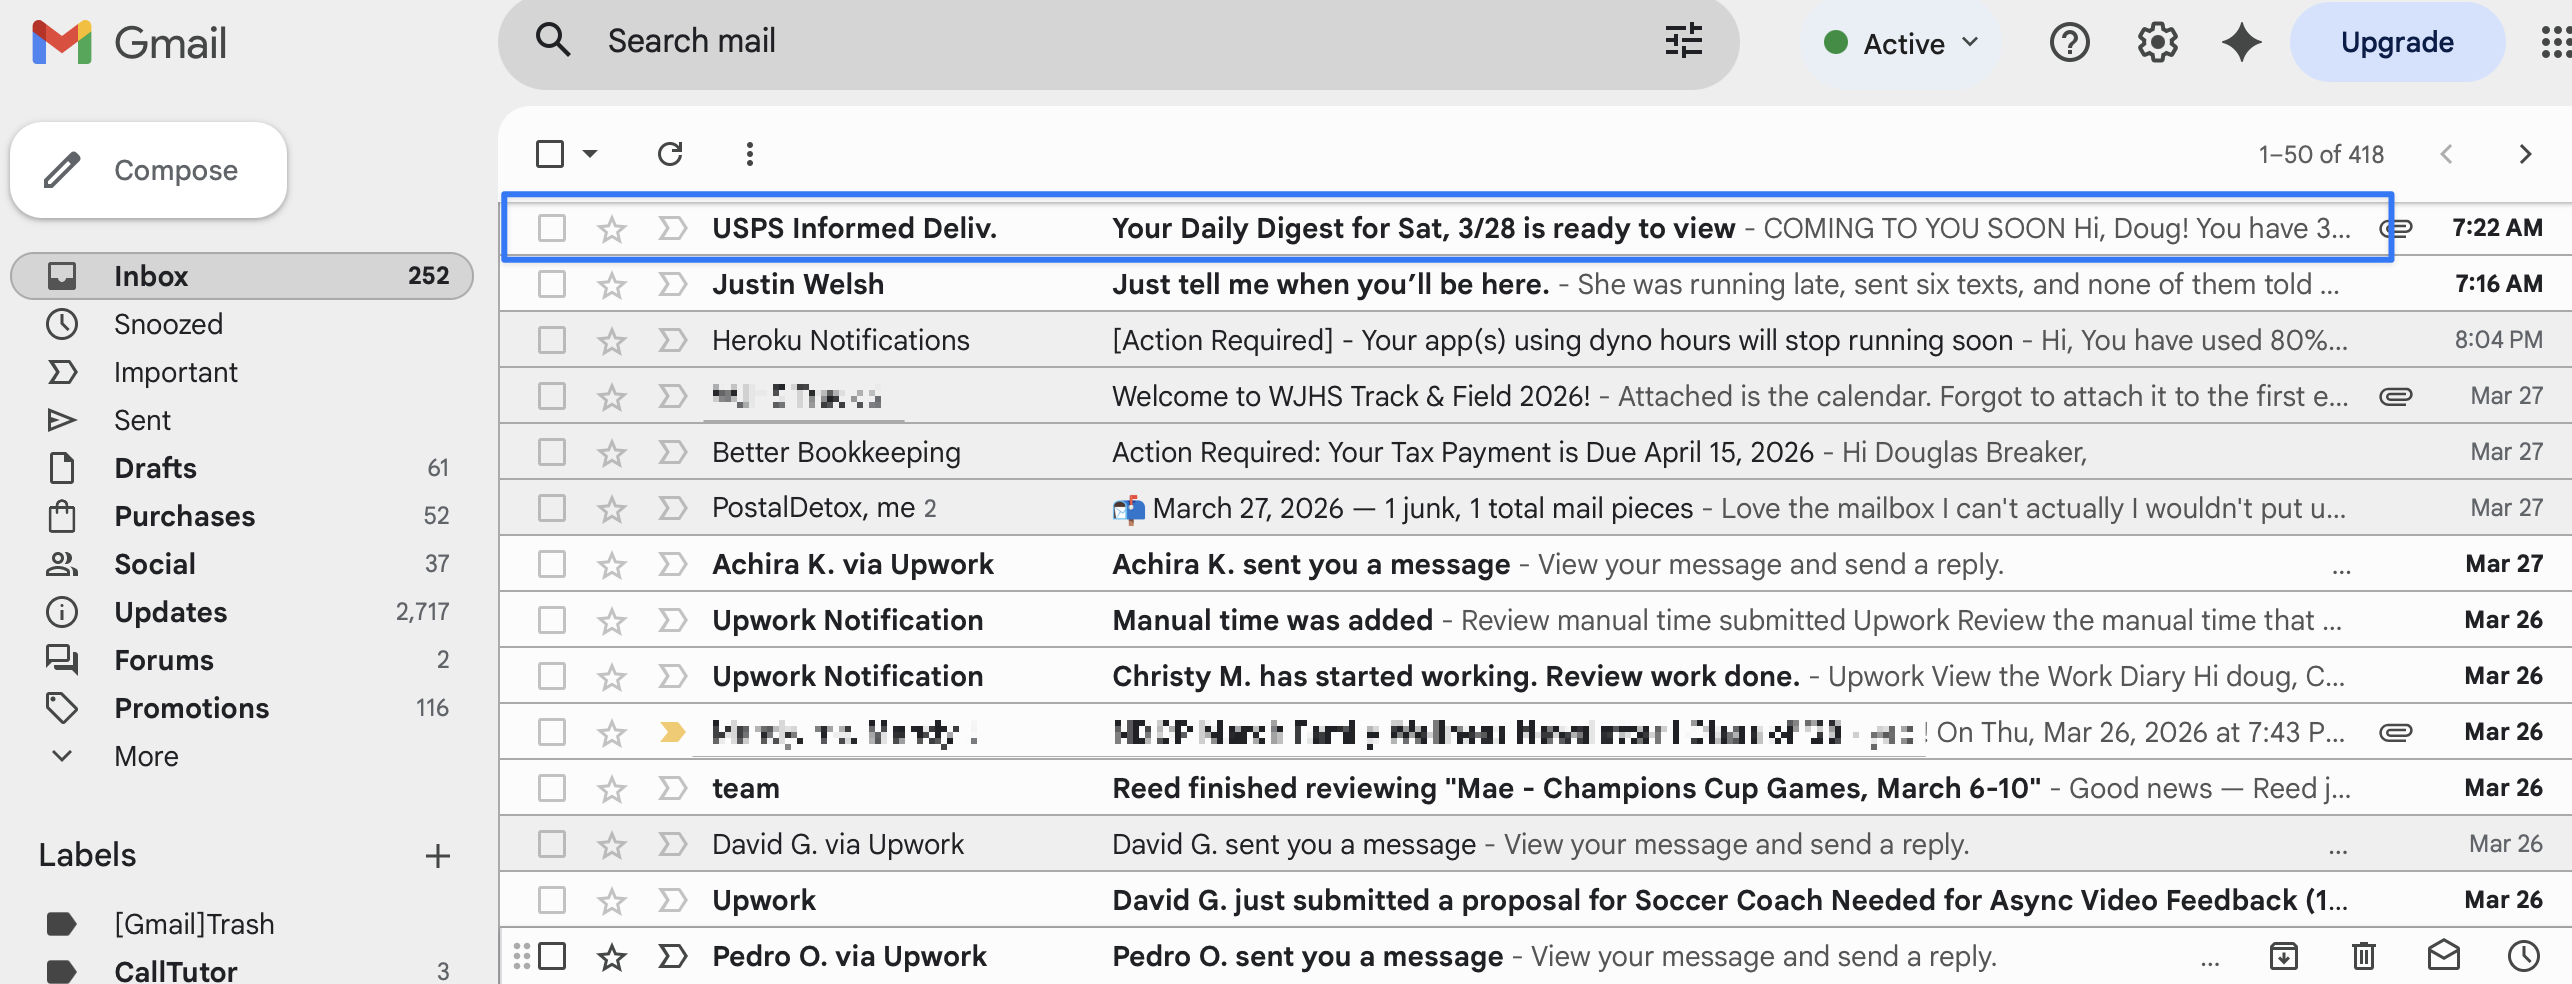
Find the email you want to filter in your inbox and click to open it.
2. Click "Filter messages like this"
With the email open, click the three-dot menu (⋮) in the top-right corner of the email. A dropdown appears. Click "Filter messages like this."
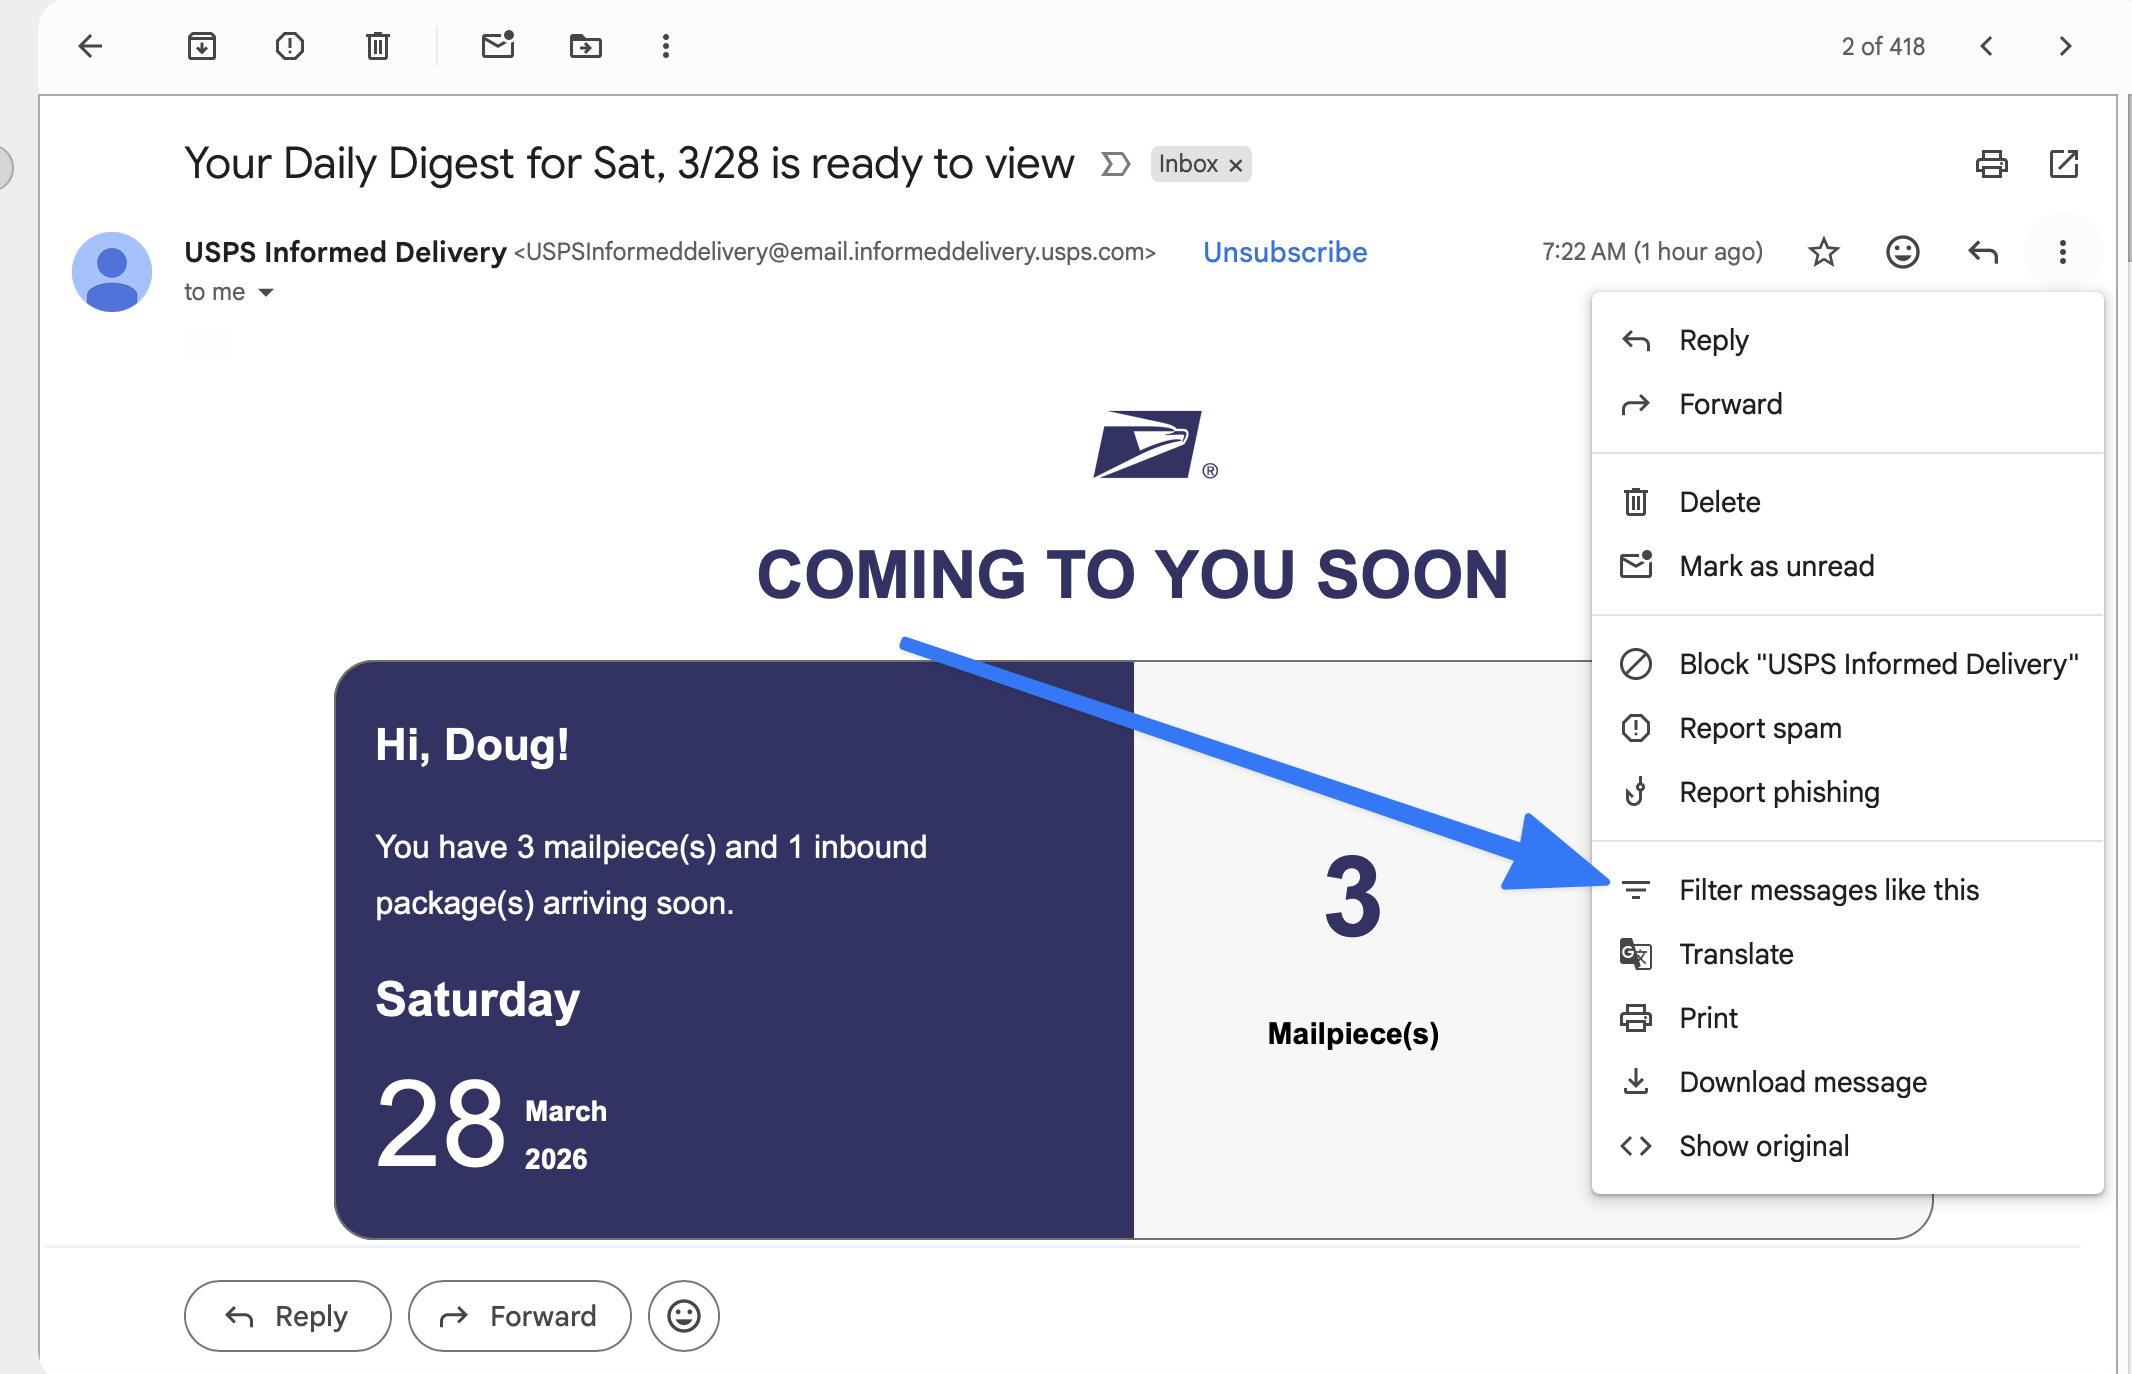
The "Filter messages like this" option is near the bottom of the dropdown menu.
3. Review the filter criteria
Gmail opens a dialog with the From field already filled in with the sender's email address. You can add more criteria if you want (subject line, specific words, size, attachments), but for most filters the From field is all you need.
Click "Create filter" to continue.
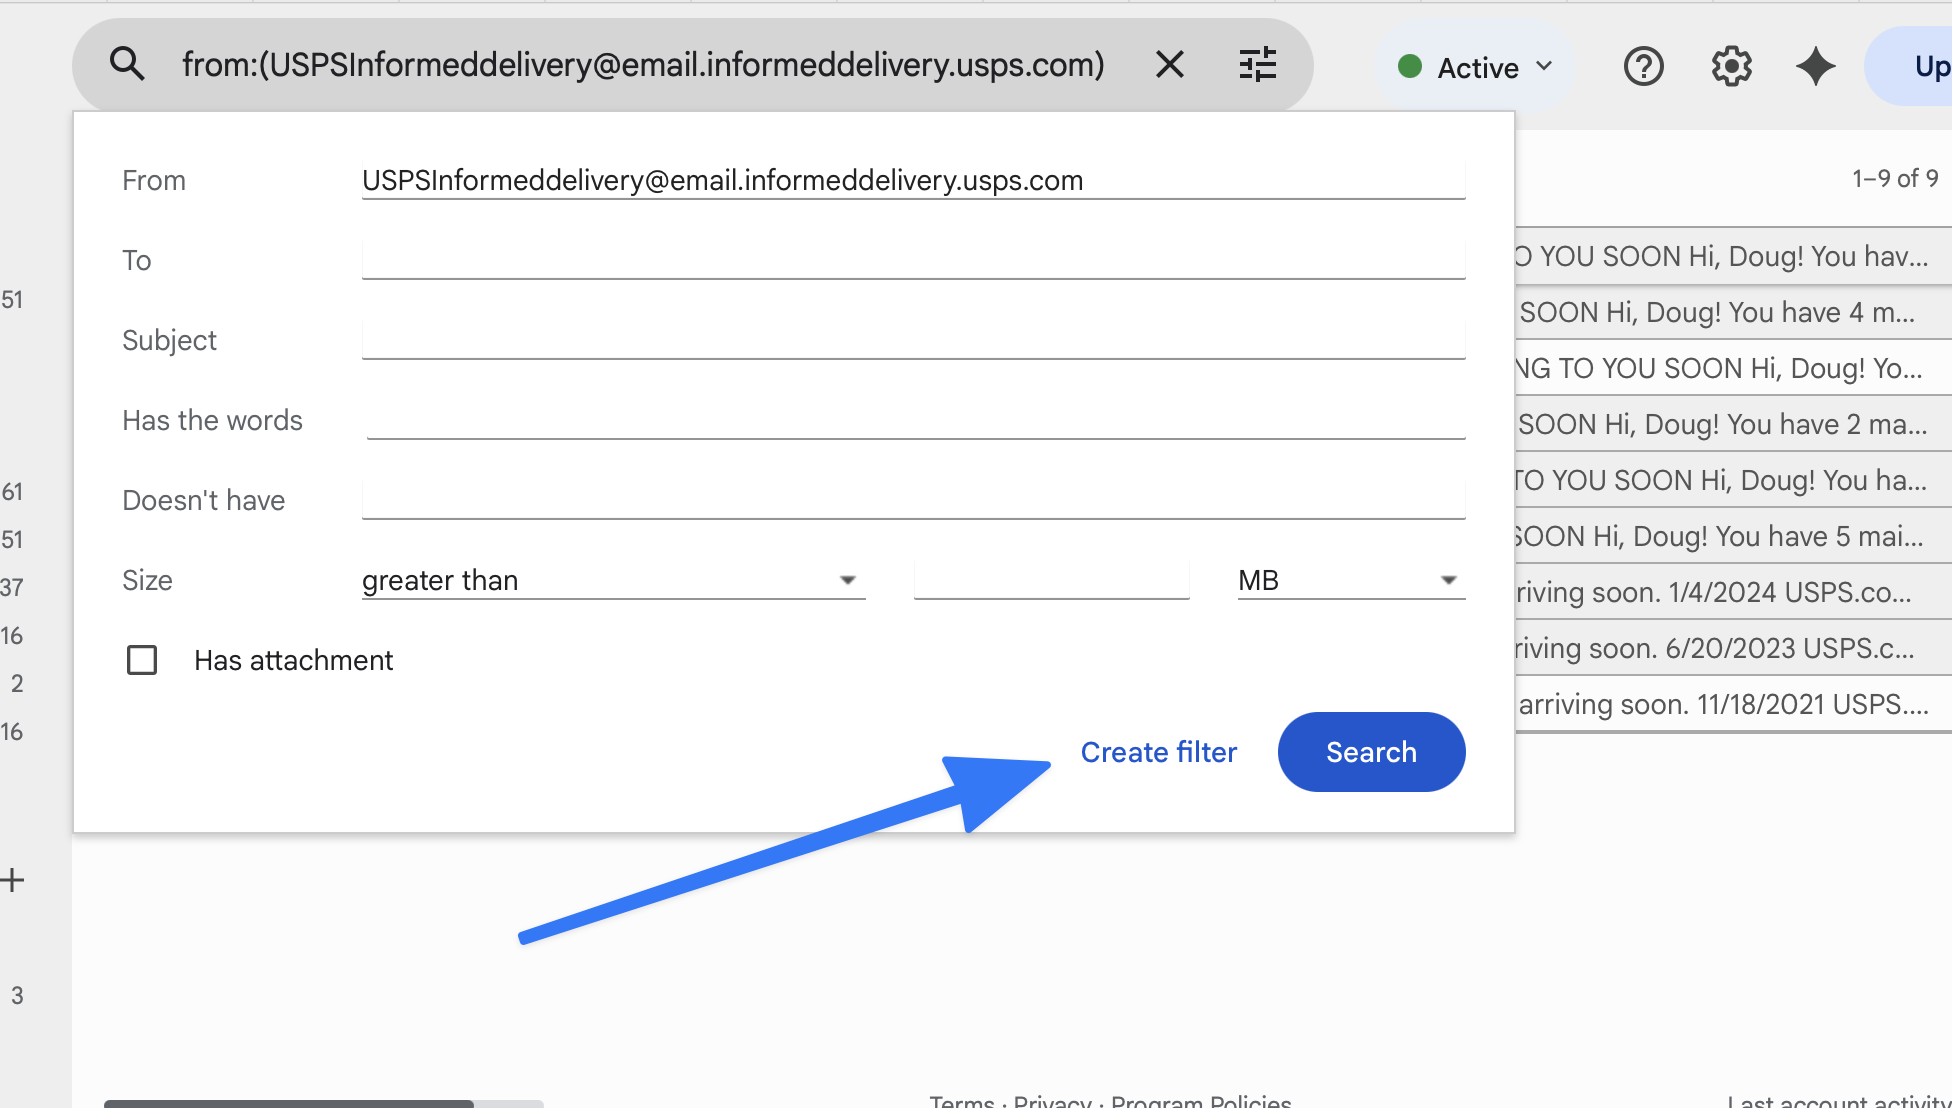
Gmail pre-fills the From field. Click "Create filter" to choose what happens with matching emails.
4. Add a forwarding address (if forwarding)
If you want to forward matching emails to another address, you'll need to add that address first. Gmail only forwards to addresses you've verified.
On the filter actions screen, you'll see "Forward it to" with a dropdown and an "Add forwarding address" link next to it. Click that link.
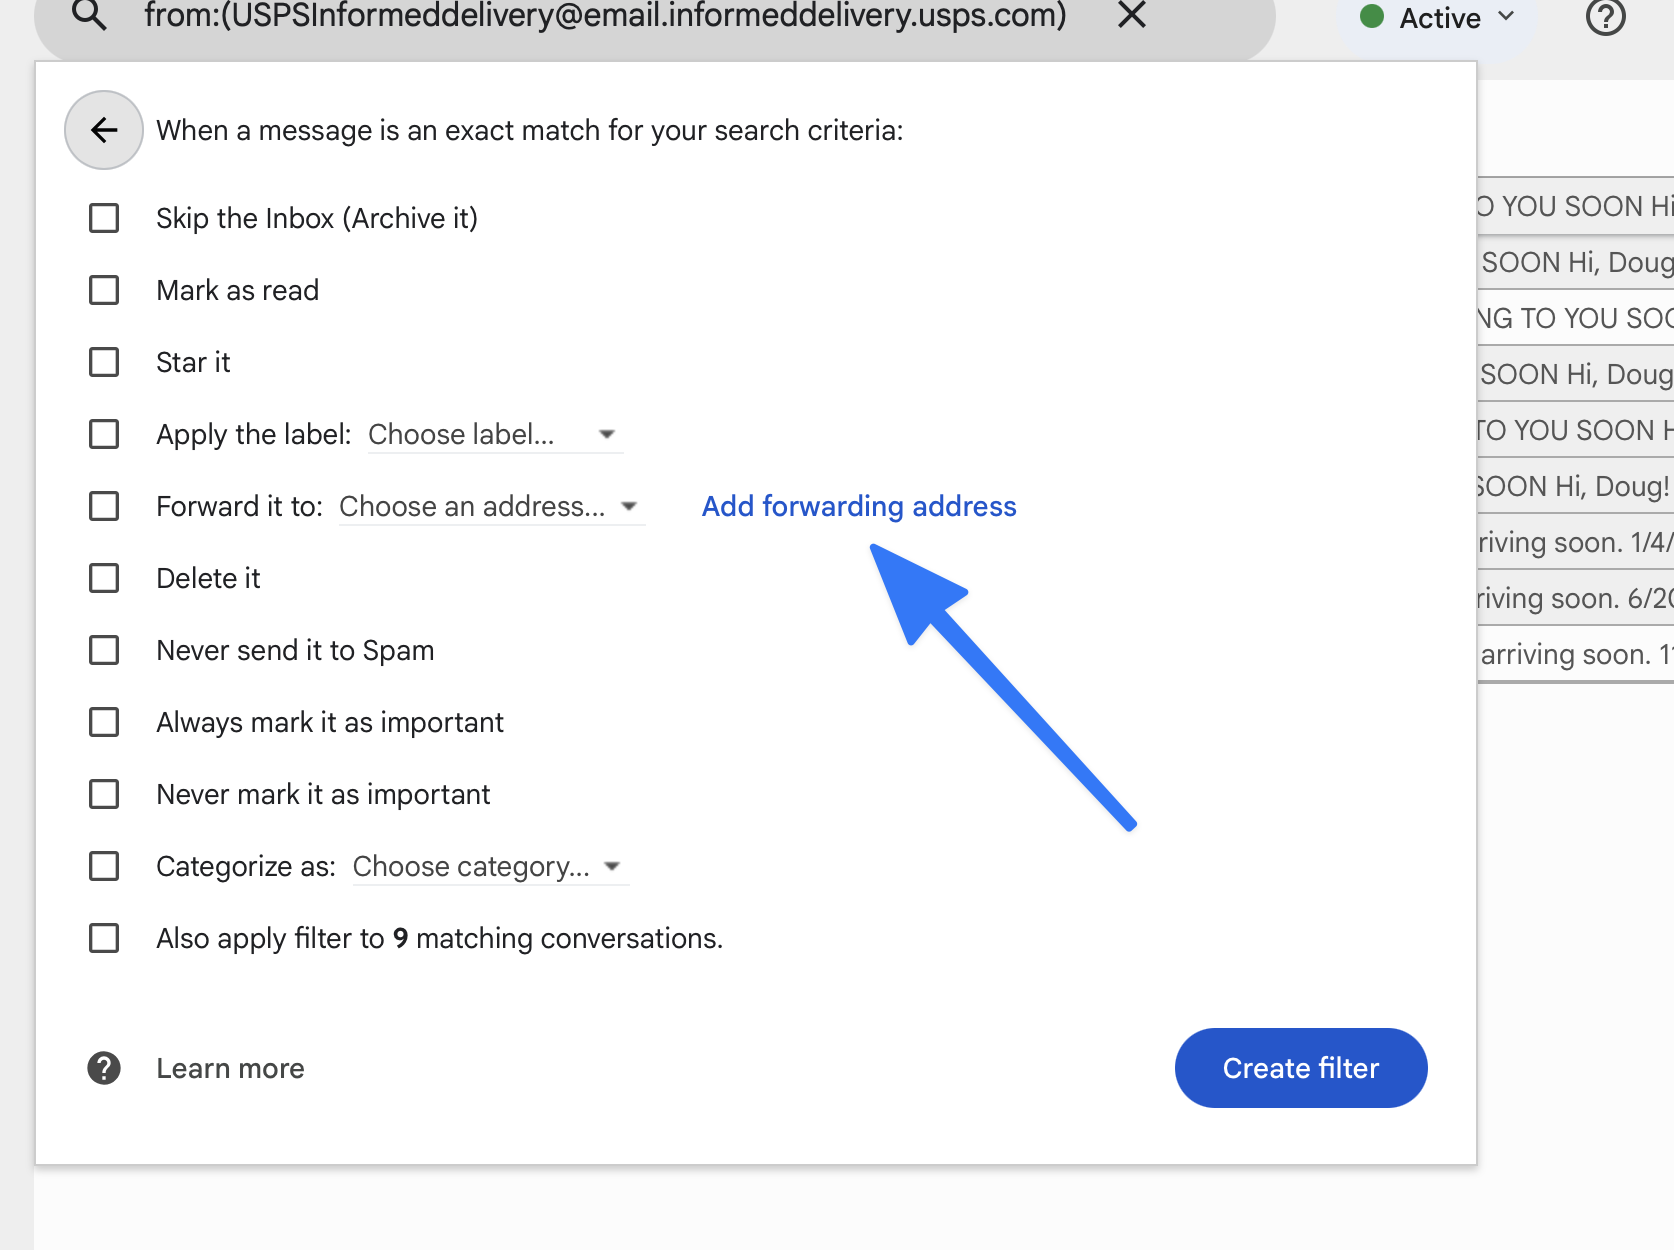
Click "Add forwarding address" to register a new forwarding destination.
Alternative route: You can also add a forwarding address from Gmail Settings directly. Go to Settings (gear icon) → See all settings → Forwarding and POP/IMAP tab → "Add a forwarding address" button.
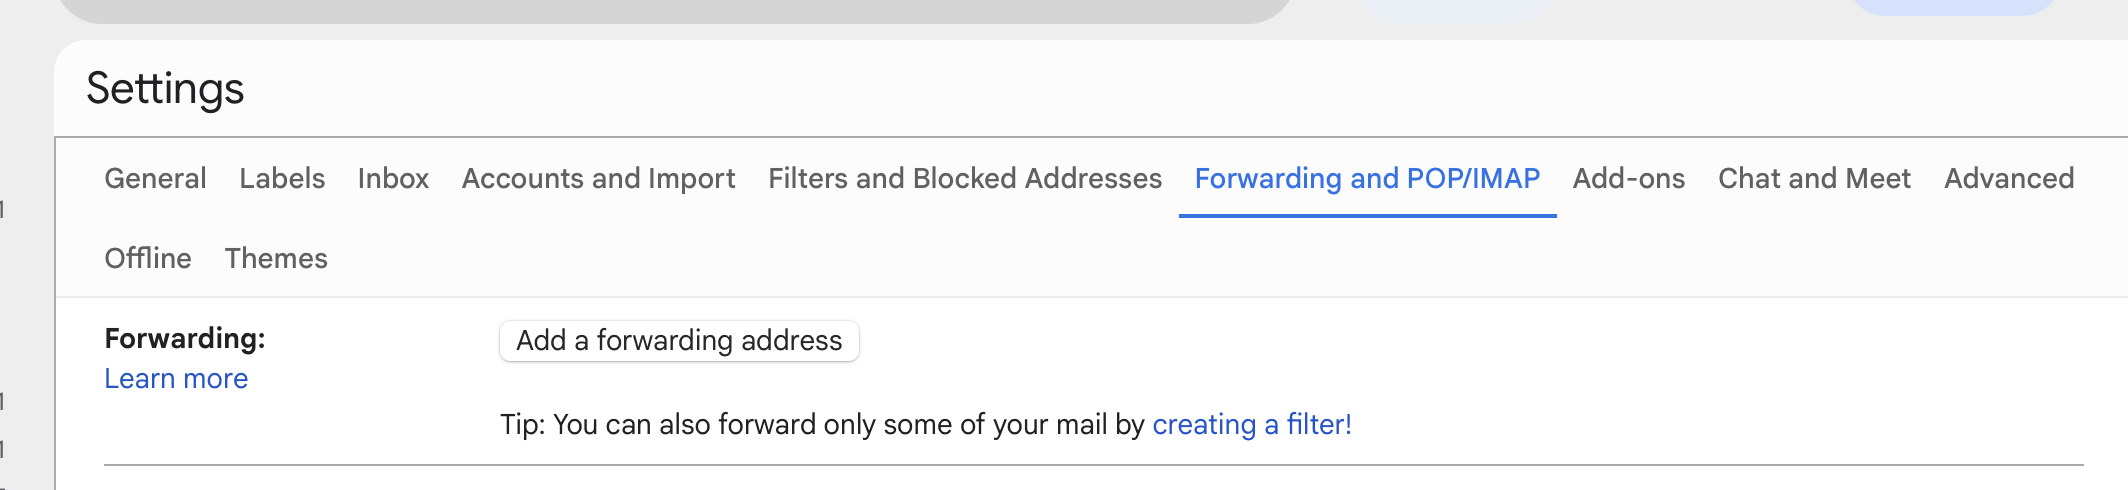
The Forwarding and POP/IMAP tab in Gmail Settings.
A dialog pops up asking for the forwarding email address. Type it in and click Next.
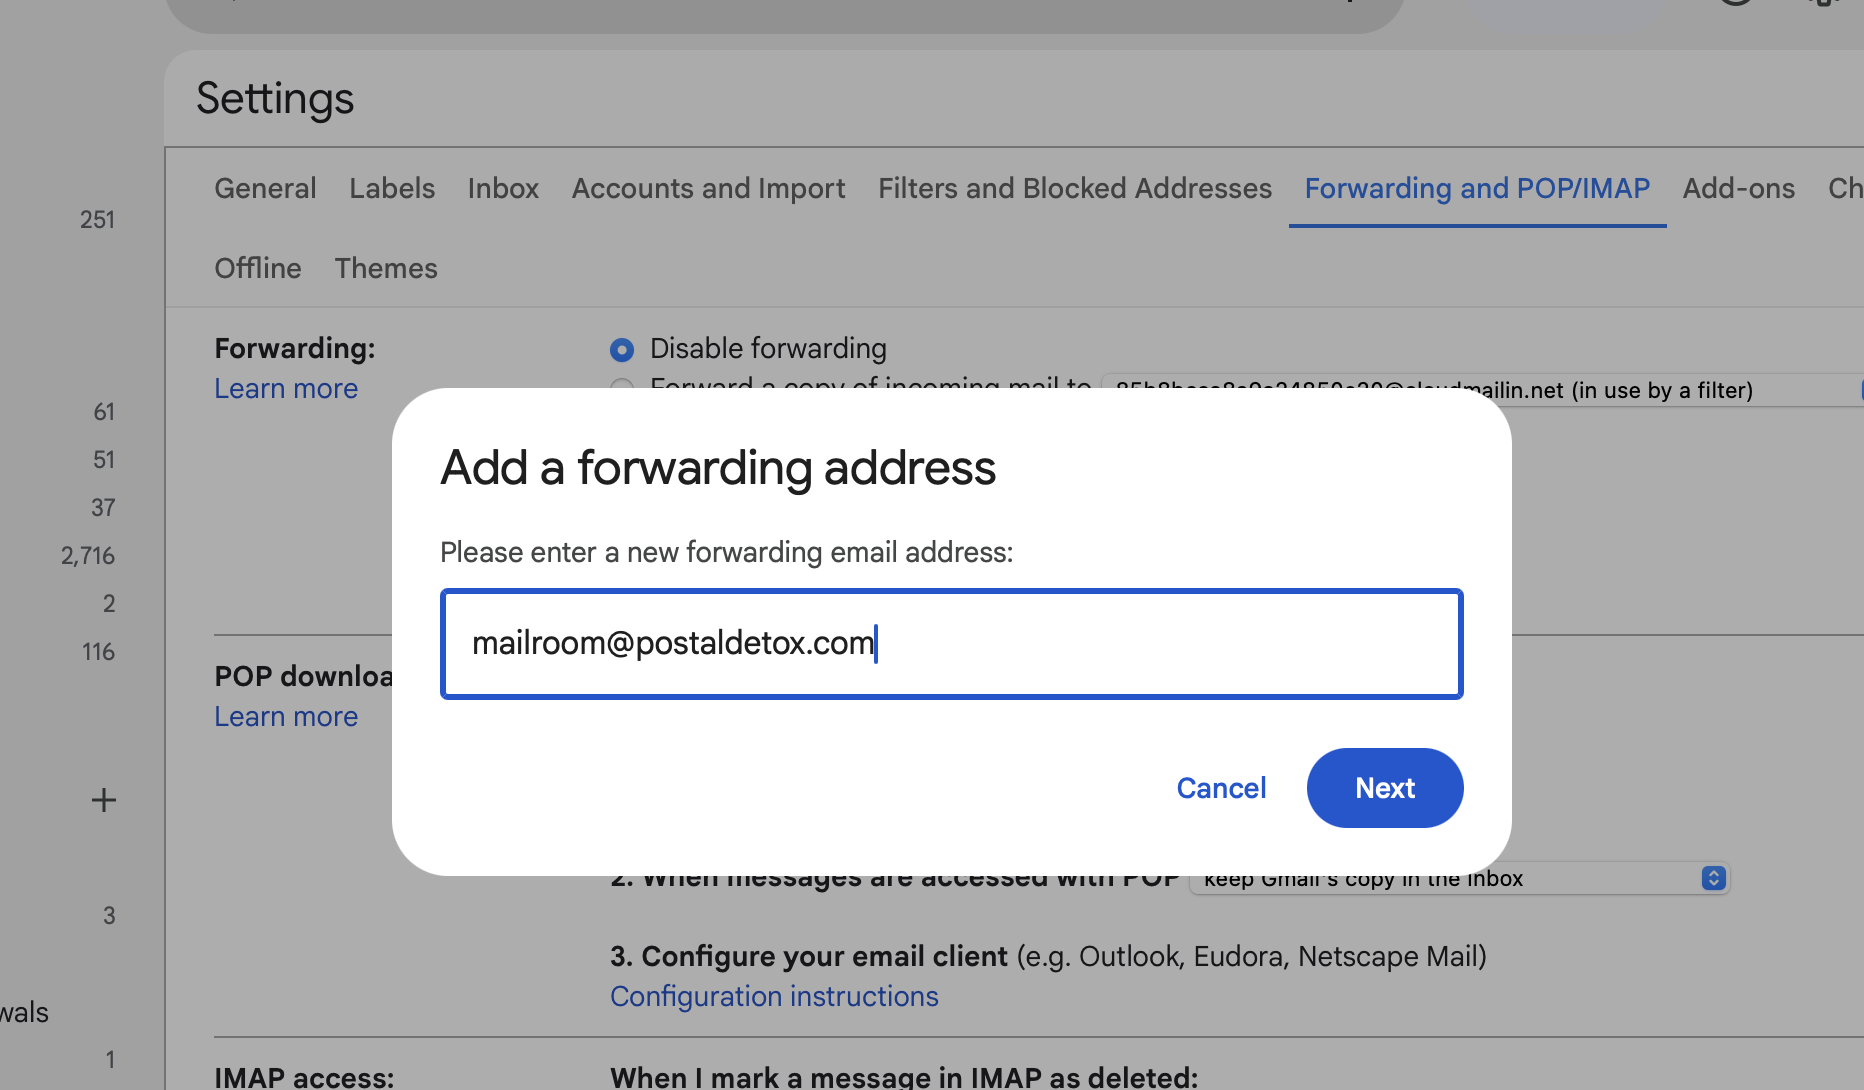
Enter the email address you want to forward to and click Next.
5. Verify the forwarding address
Gmail sends a confirmation email to the forwarding address to make sure you actually own it (or have permission to forward there). You'll see a dialog confirming this was sent.

Gmail confirms that a verification email was sent. Click OK and go check the destination inbox.
Go to the inbox of the forwarding address, find the confirmation email from Gmail, and click the Confirm button. You'll see a success screen.
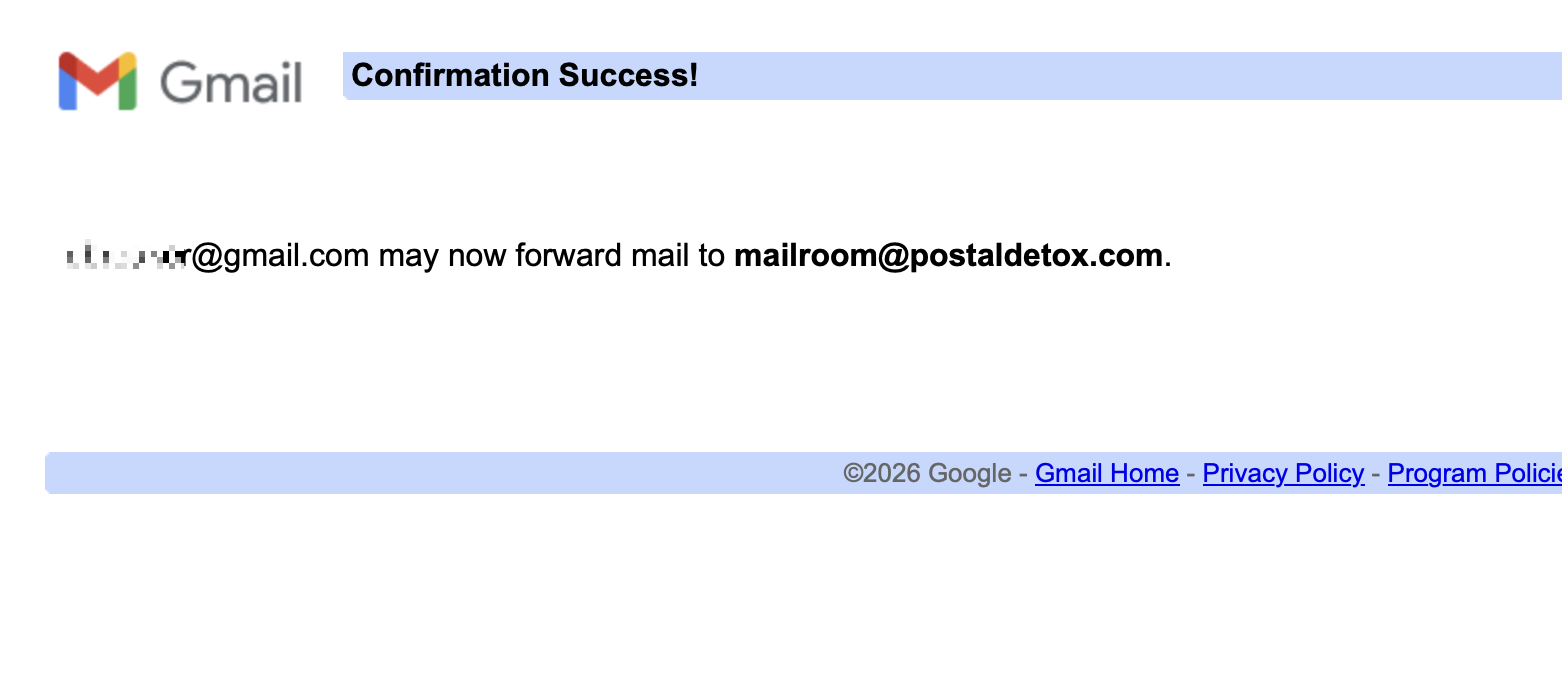
Once confirmed, Gmail can forward emails to this address.
Important: After confirming, go back to Gmail and refresh the page (Ctrl+R or Cmd+R). Gmail won't recognize the newly verified address until you reload.
6. Choose your filter action
Now go back to the filter you were creating. If Gmail closed the dialog, no problem: open any email from the same sender, click the three-dot menu, and choose "Filter messages like this" again. Click "Create filter" to get back to the actions screen.
Check the box next to "Forward it to" and select your verified forwarding address from the dropdown.
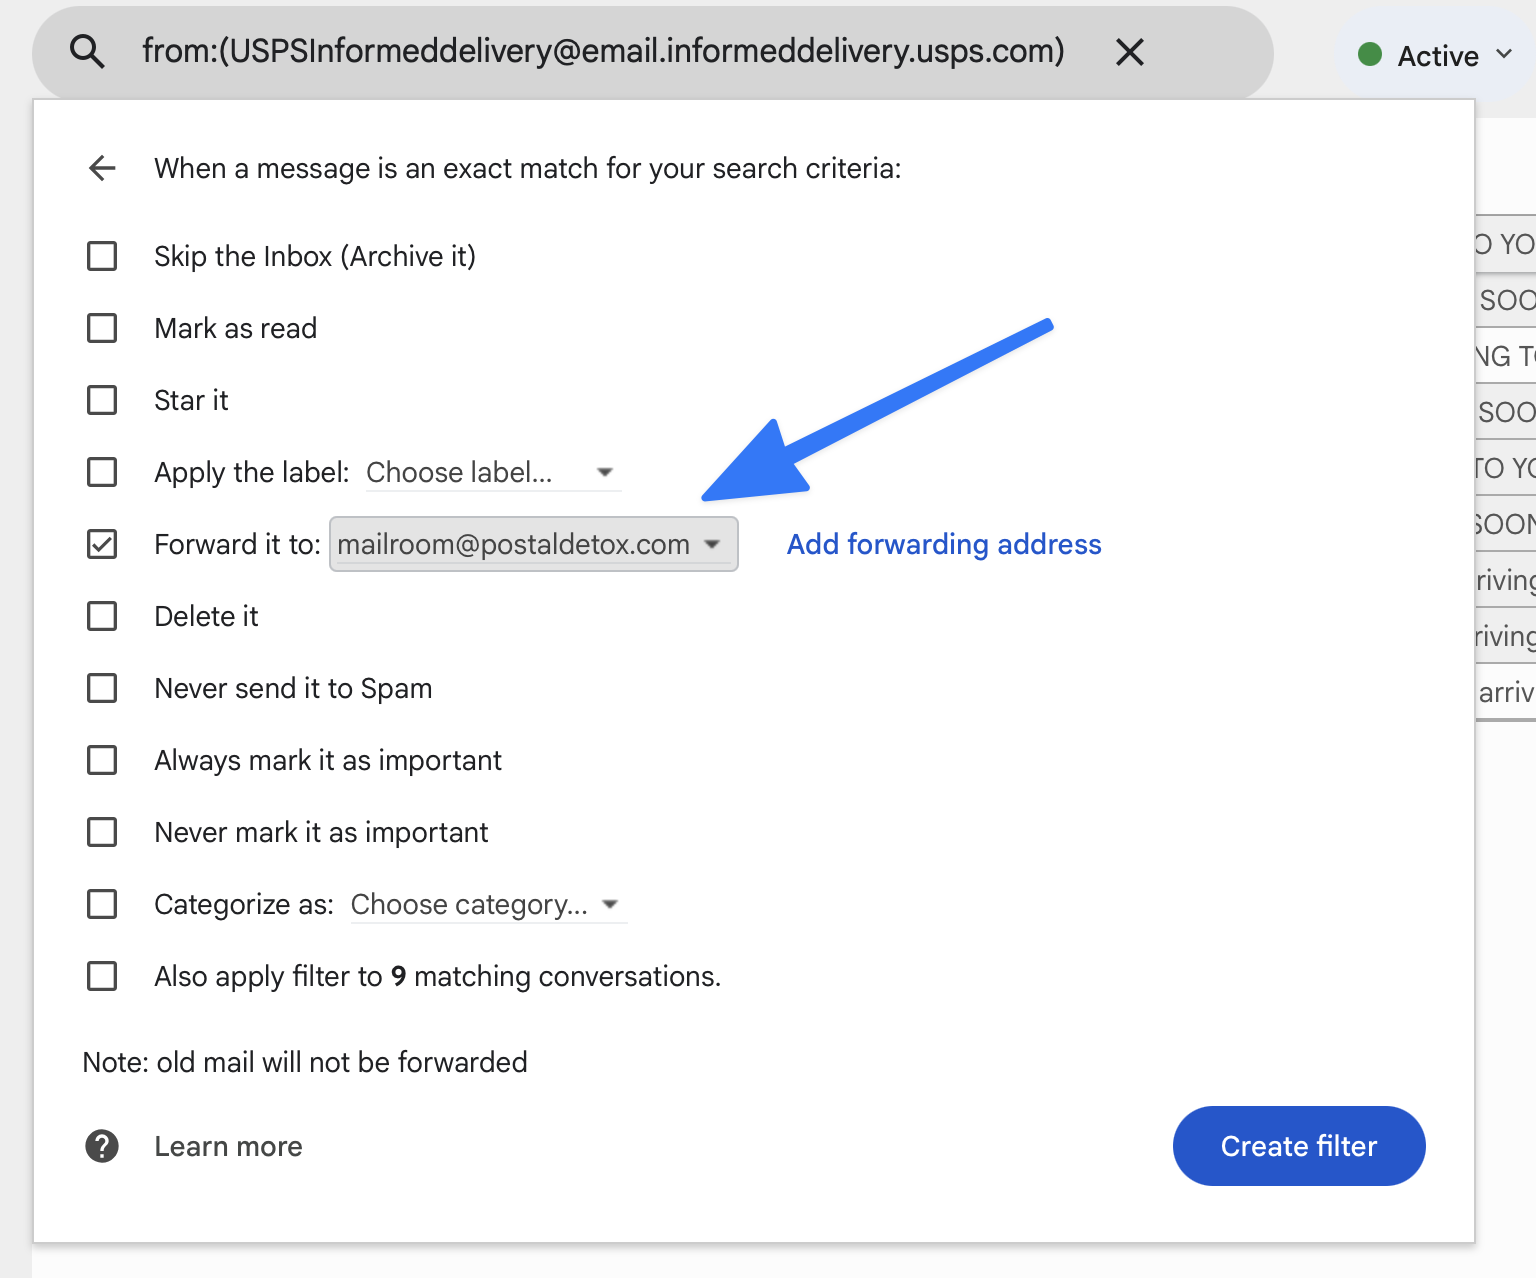
Check "Forward it to" and pick your forwarding address from the dropdown.
7. Create the filter
Click the "Create filter" button. Gmail may ask you to verify your identity first — this is a security check because forwarding rules are sensitive. Follow the prompts (usually just clicking Continue and confirming your password or passkey).
Gmail asks you to verify your identity when creating a forwarding filter. Click Continue and follow the prompts.
After verification, your filter is active. Every email matching the filter criteria will automatically be forwarded going forward. The filter appears in your Settings → Filters and Blocked Addresses tab, where you can edit or delete it anytime.
8. Other things Gmail filters can do
Forwarding is just one option. Here's the full list of filter actions:
- •Skip the Inbox (Archive it) — emails go straight to All Mail, skipping your inbox.
- •Mark as read — emails arrive pre-read so they don't show as unread.
- •Star it — automatically adds a star for easy follow-up.
- •Apply the label — sorts emails into a label (folder) automatically.
- •Forward it to — sends a copy to another email address.
- •Delete it — sends matching emails straight to Trash.
- •Never send it to Spam — ensures emails from this sender always reach your inbox.
- •Always/Never mark it as important — overrides Gmail's importance prediction.
- •Categorize as — sorts into Primary, Social, Updates, Forums, or Promotions.
You can combine multiple actions on a single filter. For example, you could forward an email AND apply a label AND skip the inbox — all at once.
9. Use case: auto-forward USPS Informed Delivery to PostalDetox
One common reason people set up Gmail filters is to automatically forward specific emails to a service. For example, USPS Informed Delivery sends you a daily email with photos of the mail arriving at your home.
PostalDetox reads those daily previews, tells you what's junk and what's important, and helps you opt out of the junk — for free. All you do is set up one Gmail filter to forward your Informed Delivery emails to us. The steps above are exactly how to do it.
The filter you'd create:
- From:
USPSInformeddelivery@email.informeddelivery.usps.com - Action: Forward it to
mailroom@postaldetox.com
Frequently asked questions
Can I create a filter without opening an email first?
Yes. Click the search bar at the top of Gmail, then click the small filter icon (sliders) on the right side of the search bar. This opens the same filter criteria dialog where you can type any sender, subject, or keyword.
Can I apply a filter to emails I already received?
Yes. When creating the filter, check the box that says "Also apply filter to [X] matching conversations." Gmail will retroactively apply the filter action to all existing emails that match.
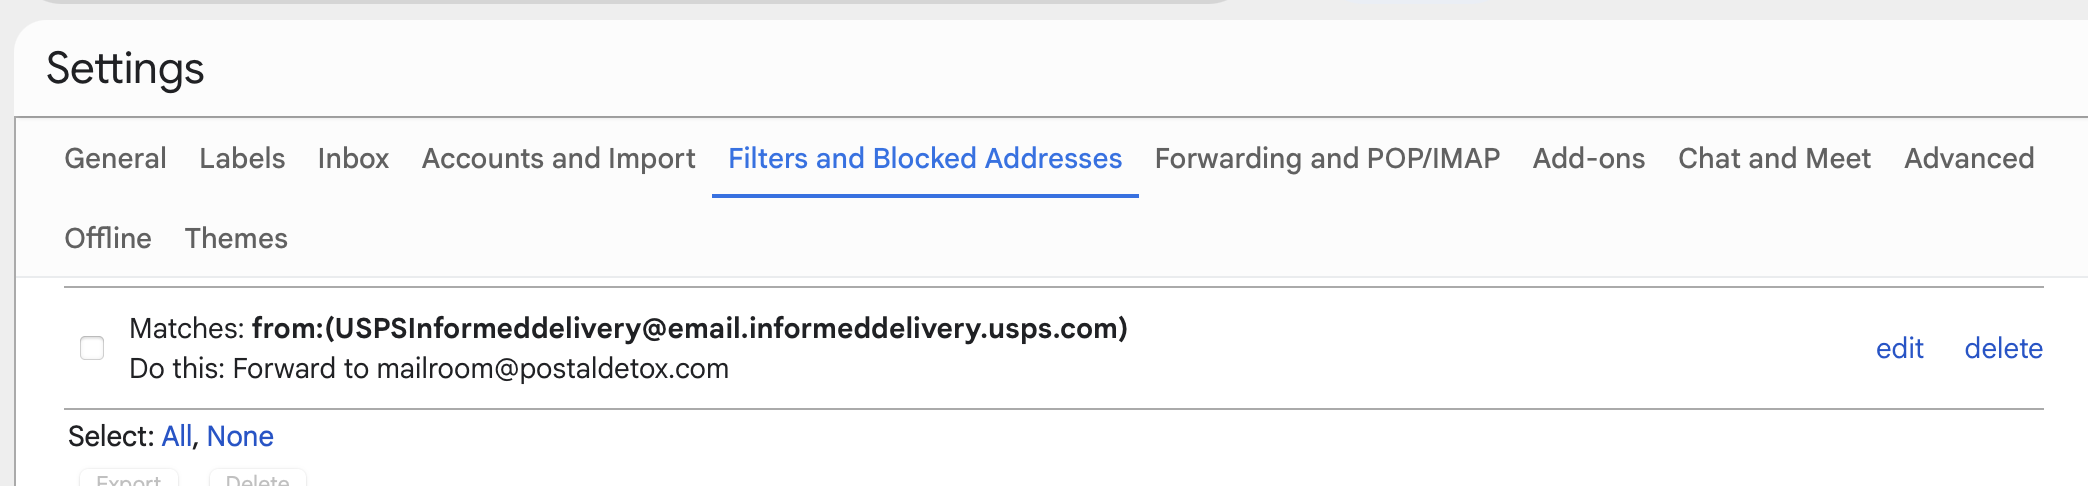
How do I edit or delete a filter?
Go to Settings (gear icon) → See all settings → Filters and Blocked Addresses. You'll see a list of all your filters. Click "edit" or "delete" next to any filter.
Is there a limit to how many filters I can create?
Gmail allows up to 1,000 filters per account. That's more than enough for most people.
Do filters work on mobile?
Filters run on Gmail's servers, so they work no matter how you access your email — desktop, phone, tablet, or any email app. However, you can only create and manage filters from the desktop version of Gmail.